Don't just hand your laptop to a friend or secondhand store; you need to protect your personal data.

zhu difeng/Shutterstock
There's a lot of value in keeping an old laptop. You can hold onto it as a backup, hand it down to a family member, use it as a media server and much more. But if your old laptop doesn't have much life left in it, you may instead decide it's time to get rid of the old machine.
Of course, you shouldn't throw an old laptop in the trash. The best options are selling or donating if it's still usable, or taking it in for safe recycling otherwise. No matter what destiny you choose for your old laptop, there are a few steps you should take first. Clearing out your files and running a factory reset are both crucial, but there's more to it. Whether you're getting rid of a MacBook or a Windows computer, make sure you do what's necessary to protect your private information and prepare the device for a new owner, if applicable.
Back up everything first
Jun/Getty Images
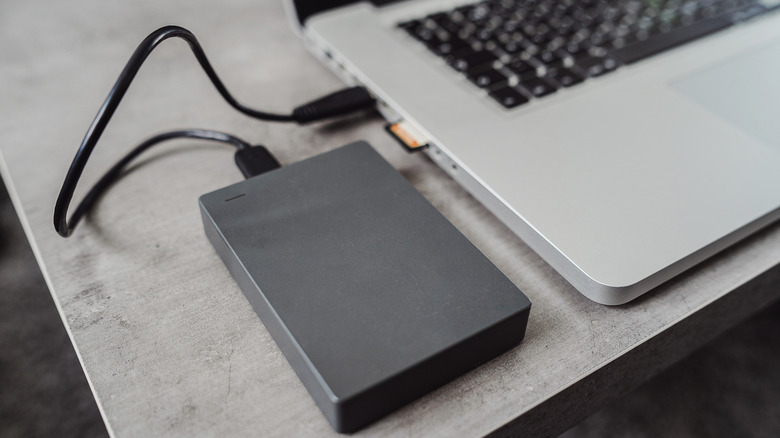
Backing up is always the important first step, even before transferring files to a new laptop. On a Windows PC, you can use Windows Backup by searching for it in the Start menu. You'll see a list of what can be backed up to OneDrive and when you last did. While convenient, its major roadblock is that free Microsoft accounts only comes with 5GB of cloud storage. You can subscribe for more if you like; another option is making a local backup to a portable HDD or SSD. While you can copy files to the drive manually, EaseUS Todo Backup's free version is a good choice for automating this. Since Windows Backup covers settings like account details and personalization features, a combination backup is smart.
For a MacBook, use Apple's Time Machine. The built-in macOS backup tool can back up everything onto a USB drive so you can recover it on another computer. Visit System Settings > General > Time Machine > Add Backup Disk, then select the storage device you have connected (ideally with at least twice the storage of your MacBook) and follow the instructions. You can also use iCloud to back up some kinds of data under System Settings > [Your Name] > iCloud > Saved to iCloud. Apple offers only 5GB of free storage, but you can subscribe for more.
Third-party backup software and cloud services can also work. As a supplement to the full backup, double-check important apps, like enabling sync in your browser so you don't lose your bookmarks. Also check the ports on your laptop to make sure you don't leave any accessories behind, like small USB dongles or SD cards.
Before you move on, sign out of all accounts and de-authorize software licenses for tools like the Adobe suite. Some licenses can only be used on a certain number of computers, so you don't want to have a phantom machine wasting one of your spots. If you're not sure whether your license can be moved to a new computer by signing into your account, copy the license or product key so you can contact the provider.
Do a proper wipe of your laptop

Organic Media/Getty Images
You're now ready to wipe the machine. While a basic factory reset is the simplest option, data you remove from a computer is still technically recoverable. Thankfully, modern versions of Windows and macOS have built-in reset tools that de-authorize your accounts, wipe the machine, reset everything and make what you had on the drive unrecoverable. Third-party software is also available if you want to make sure the drive is totally clean.
The process for wiping a Windows laptop varies by version. For Windows 11, go to Start > Settings > System > Recovery > Reset PC. Choose Remove everything, then select Cloud download or Local reinstall depending on how you want to reinstall the OS. When presented with the Additional settings page, choose Change settings and enable Clean data to securely overwrite the drive.
On Windows 10, go to Settings > Update & security > Recovery and click Get started under Reset this PC; the process is similar to Windows 11 from there. For Windows 8.1, this is under Settings > Change PC settings > Update and recovery > Recovery; click Get started under Remove everything and reinstall Windows. For Windows 7, you'll need to use bootable media, access the manufacturer's recovery partition or run a third-party tool to erase everything on the drive.
For a Mac running macOS Monterey or later, open System Settings > General > Transfer or Reset > Erase All Contents and Settings. You'll have to enter your computer password as well as your Apple ID password to sign out of that. Confirm the erasure, then the computer will sign you out of iCloud, wipe and restart.
For older Intel-based Macs, you need to first sign out of iCloud manually to remove Activation Lock; you'll find this under System Settings > [Your Name] > Sign Out or System Preferences > Apple ID > Overview > Sign Out depending on your macOS version. After that, go into Recovery Mode (hold Command + R after a restart), select Disk Utility > Continue > Erase, and choose APFS (assuming your Mac has an SSD). Finally, pick Erase Volume Group or Erase. Once it's done, if someone else will use the computer in the future, quit Disk Utility and choose Reinstall macOS to install a fresh copy.